|
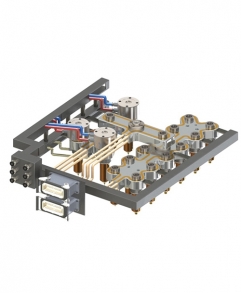
1.- introducing the nozzle (piece 5) into its housing in the mold. 2.- Height Measure A and check that all the nozzles have the same measure (+ -0.02) 3.- Check the bottom of the nozzles. The toe has to be slightly hidden dimension B (see expansion nozzle) 4.- Place the centering (part 7). When we put the camera (part 2). The centering (item 7) should avoid moving the camera, but not prevent the camera (pieza2) sits on the surface of the nozzles (part 5). 5.- Place the centering (part 7). When we put the manifold, (part 2). The centering (item 7) should avoid moving the camera, but not prevent the camera (pieza2) sits on the surface of the nozzles (part 5). 6.- Paint the top of the nozzle and place the manifold (part 2). 7.- Once all steps are correct, proceed to anchor the manifold (part 2) with screws (item 6). 8.- With the manifold (part 2) fixed, we will measure the height from block C to the top plate, to obtain an accurate measurement of the stops (Part 1). The length of the cap (item 1) must be higher than 0.15 mm as C obtained.To confirm the correct break, we will set caps (part 1) and the paint. Close the top plate, remove and re-verify the consistency of the brand of paint. 9.- If everything is correct, tighten the mold plates and connect the wiring. MEASURES NECESSARY, FOR THE MANUFACTURE OF A CHAMBER * MOLD PLATE DOTS (A) (B) (C) (D) (E) * DIMENSIONS between nozzle centers (L), depending on the number of injection points. * Type of injection, to determine the shape of the toe. (Direct to part), (To cast), (Obturation). * Weight of the piece to be injected and type of material injected. |
Quien está conectado
There are currently 0 users online.

